
hose guides diy
DIY hose guides are simple, eco-friendly solutions to protect plants from hose damage while adding a decorative touch to your garden. They are easy to make using recycled materials like PVC pipes, rebar, or even creative items like wine bottles or old door knobs. These guides are both functional and customizable, offering a cost-effective way to organize your watering system and enhance your garden’s appearance. With basic tools and materials, you can create durable hose guides that blend seamlessly into your outdoor space, providing practical benefits and personal style.
What Are Hose Guides?
Hose guides are simple devices designed to protect plants and garden beds from damage caused by heavy garden hoses. They are typically placed around plants or along garden paths to keep hoses elevated or redirected. Made from materials like PVC pipes, rebar, or recycled items, these guides prevent hoses from crushing delicate foliage. They can also be decorative, adding a personal touch to your garden while serving a practical purpose. Hose guides are easy to install and customizable to fit any garden layout or style.
Why DIY Hose Guides Are a Great Solution
DIY hose guides are an excellent solution for gardeners seeking a budget-friendly and customizable way to protect plants from hose damage. They allow for creativity, using recycled materials like PVC pipes, rebar, or even decorative items such as wine bottles. By making your own guides, you can tailor them to your garden’s specific needs and style while saving money. This eco-friendly approach also reduces waste, making it a practical and sustainable choice for garden care.
Benefits of Making Your Own Hose Guides
Creating your own hose guides offers numerous benefits, including cost savings, customization, and environmental friendliness. DIY projects allow you to use recycled materials, reducing waste and expenses. Custom designs ensure your guides fit your garden’s unique layout and style. Additionally, homemade guides protect plants from damage and prevent hose kinking, improving watering efficiency. This hands-on approach also fosters creativity and personal satisfaction, making it a rewarding project for gardeners of all skill levels.
Materials and Tools Needed
Essential materials include PVC pipes, rebar, wooden stakes, and recycled items like old door knobs or wine bottles. Basic tools such as drills, saws, and hammers are required.
PVC Pipes and Fittings
PVC pipes and fittings are ideal for DIY hose guides due to their durability, flexibility, and affordability. They can be easily cut to desired lengths and connected to form sturdy structures. Weather-resistant and lightweight, PVC materials are perfect for outdoor use. By using PVC pipes, you can create customizable hose guides that withstand various environmental conditions while maintaining functionality. Their versatility allows for creative designs, making them a popular choice for gardeners seeking practical and long-lasting solutions.
Rebar or Metal Rods
Rebar or metal rods provide a sturdy base for DIY hose guides, ensuring stability and durability. They are ideal for anchoring the guide in the ground, preventing movement or tipping. Metal rods offer excellent strength and can withstand outdoor conditions, making them a reliable choice. While they require some effort to install, their longevity and resistance to weathering make them a practical option for creating long-lasting hose guides that protect plants and keep hoses organized.
Wooden or Plastic Stakes
Wooden or plastic stakes are lightweight yet effective for securing DIY hose guides. They are easy to install and remove, making them ideal for temporary setups. Wooden stakes blend naturally with garden aesthetics, while plastic stakes offer durability and low maintenance. Both options are budget-friendly and versatile, allowing you to customize the height and placement of your hose guides to suit your garden layout and protect your plants from hose damage efficiently.
Recycled Materials for Creative Designs
Recycled materials like wine bottles, old door knobs, and leftover PVC pipes add a creative twist to DIY hose guides. Wine bottles can be inverted over rebar for a decorative touch, while door knobs provide a sturdy base. Using recycled items reduces waste and allows for unique, personalized designs. These eco-friendly solutions not only protect plants but also enhance garden aesthetics, making your hose guides both functional and visually appealing. This approach encourages sustainability while showcasing your creativity.
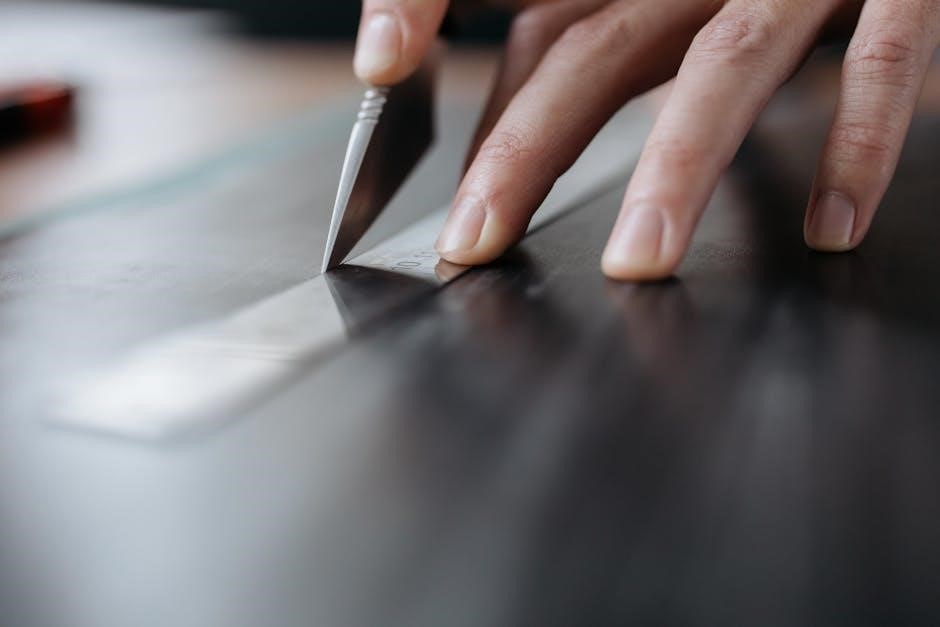
Basic DIY Tools (Drill, Saw, Hammer)
A drill is essential for creating holes in materials like PVC pipes or wood, ensuring a snug fit for the hose. A saw is used to cut pipes, rebar, or stakes to the desired length. A hammer helps drive stakes into the ground, securing the hose guide firmly. These tools are fundamental for assembling and anchoring the structure, making the DIY process straightforward and efficient. They ensure stability and proper installation, allowing the hose guide to function effectively in your garden.
Step-by-Step Guide to Making Hose Guides
Measure, cut, and assemble materials like PVC pipes or rebar. Secure the structure in the ground and test its stability. Follow clear, actionable steps for success.
Measuring and Cutting the Rebar
Begin by measuring the rebar to your desired height, ensuring it will securely hold the hose guide above the ground. Mark the length with a marker or tape. Use a hacksaw or bolt cutters to cut the rebar accurately. Wear gloves and safety goggles for protection. For stability, cut multiple pieces if creating a series of guides. Double-check measurements to ensure the rebar fits properly with the PVC sleeve or other materials. Smooth any sharp edges after cutting for safety.
Drilling Holes for the Hose
Using a drill bit slightly larger than the hose diameter, carefully create holes in the PVC pipe or other material. Space the holes evenly to allow the hose to move freely. Ensure the holes are aligned vertically to prevent kinking or bending of the hose. For multiple guides, drill holes at consistent heights to maintain uniformity. Sand the edges of the holes to remove burrs and avoid damaging the hose. This step ensures a smooth, functional guide for your watering needs.
Assembling the Hose Guide Structure
Attach the PVC pipe or other material to the rebar base, ensuring stability. Use fittings like elbows or couplers to create the desired shape. For decorative touches, slide items like inverted wine bottles or old door knobs over the rebar. Secure all components tightly to prevent wobbling. Ensure the hose can slide smoothly through the structure without obstruction. Finally, place a cap on the top to protect the interior from debris. This step completes the functional and visually appealing hose guide.
Securing the Guide in the Ground
To secure the hose guide, anchor the rebar or metal rod firmly into the ground. Pound it in until it reaches the desired height, ensuring stability. For added durability, surround the base with concrete if needed. Make sure the structure stands upright and doesn’t wobble. Once set, slide the PVC pipe or decorative elements over the rebar, ensuring proper alignment. This step ensures the guide remains in place, protecting plants and guiding the hose effectively during use.
Testing the Hose Guide
Testing the hose guide ensures it functions properly and protects your plants. Start by sliding the hose through the guide to check for smooth movement. Verify that the guide holds the hose securely and doesn’t allow it to sag or kink. Inspect the stability of the structure by gently tugging on it. Make sure the guide doesn’t shift or tip over. Finally, water your plants to see if the guide effectively directs water flow without damaging nearby foliage. This step confirms your DIY project’s success.
Creative Ideas for Hose Guides
Transform your hose guides into garden art using recycled materials. Try upcycling old door knobs, wine bottles, or adding colorful paint for a personalized touch.
Using Wine Bottles as Decorative Tops
Transform your hose guides into elegant garden features by using wine bottles as decorative tops. Clean and cut the bottles, then attach them to the guide structure. This creative upcycling adds a touch of sophistication and personal style to your garden. The colorful glass catches the light, creating a visually appealing contrast with the surroundings. It’s an eco-friendly way to repurpose old bottles while protecting your plants from hose damage. Paint the bottles to match your garden theme for a cohesive look.
Upcycling Old Door Knobs or Drawer Pulls
Give your hose guides a unique, vintage charm by upcycling old door knobs or drawer pulls. Attach these decorative pieces to the top of your hose guides using sturdy metal stakes or rods. This creative reuse adds both functionality and style, protecting plants from hose damage while enhancing your garden’s aesthetic. Paint or refinish the knobs to match your garden decor, turning discarded items into functional and eye-catching features. It’s an eco-friendly way to add personality to your DIY project.
Adding Color with Paint or Stickers
Add a personal touch to your DIY hose guides by incorporating color with paint or stickers. Use weather-resistant paints to match your garden’s theme or apply vibrant stickers for a playful look. This simple step transforms functional guides into decorative garden features, making them stand out while blending seamlessly into your outdoor space. It’s an easy way to add personality and create a cohesive design that enhances your garden’s charm and appeal.
Creating a Blinged DIY Hose Guide
Elevate your garden’s style with a blinged DIY hose guide. Add sparkle by attaching rhinestones, beads, or sequins to the structure. Use metallic paints or glue on decorative elements like seashells or small ornaments. For a luxurious touch, incorporate recycled jewelry or crystal fragments. This creative approach not only protects your plants from the hose but also adds a dazzling, one-of-a-kind feature to your garden. It’s a fun way to combine functionality with personal flair, making your hose guide a standout piece.
Practical Tips for Hose Guides
Position guides strategically for optimal water flow and plant protection. Adjust heights for different hose sizes and ensure stability to prevent tripping. Regular cleaning ensures longevity.
Positioning Guides for Optimal Water Flow
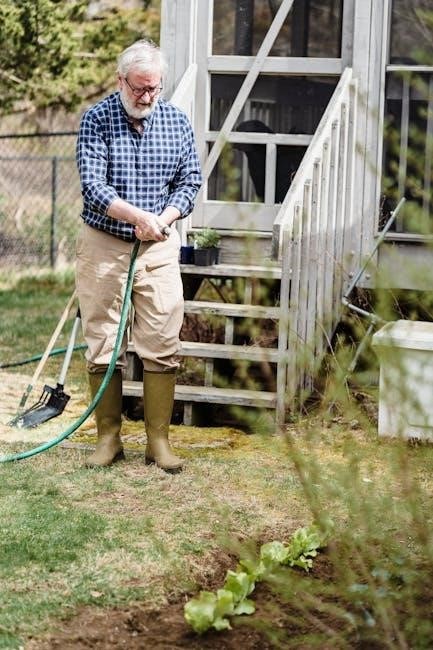
Positioning hose guides strategically ensures proper water distribution and protects plants from damage. Place guides near faucets to direct the hose away from vulnerable areas. Angle guides slightly upward to maintain even water flow and prevent kinking. For garden beds, position guides around plant borders to keep hoses from crushing flowers or vegetables. Space guides evenly, about 6-8 feet apart, to maintain hose stability. Elevate guides slightly to avoid water pooling and ensure efficient irrigation. This setup promotes healthy plant growth and minimizes garden maintenance.
Protecting Plants from Hose Damage
Hose guides are essential for safeguarding plants from the weight and friction of garden hoses. By elevating the hose, they prevent it from lying directly on plants, which can cause damage or even kill delicate growth. Position guides around garden beds and near sensitive areas to keep hoses organized and directed away from flowers and vegetables. This simple solution ensures water reaches its target without harming your garden, promoting healthy plant growth and maintaining your garden’s aesthetic appeal. Regular use extends plant longevity and reduces gardening frustrations.
Using Hose Guides for Different Hose Sizes
DIY hose guides can be adapted to fit various hose sizes, ensuring versatility for different watering needs. Use PVC pipes or metal rods with diameters matching your hose size for a secure fit. For larger hoses, consider slightly wider guide openings or adjustable designs. Smaller hoses may require narrower openings to prevent sagging. By customizing the guide structure, you can accommodate any hose size, ensuring efficient water flow and proper support. This adaptability makes DIY guides a practical solution for all garden setups.
Making Adjustable Hose Guides
Adjustable hose guides offer flexibility for various garden layouts and hose sizes. Use hinges or sliding mechanisms to create movable guides, allowing easy repositioning. Consider adding brackets or joints that can be tightened or loosened as needed. For added convenience, incorporate materials like flexible PVC pipes or adjustable clamps. This design ensures your guides can accommodate different hose sizes and adapt to changing garden needs, providing long-term versatility and practicality for your watering system.
Diy vs. Store-Bought Hose Guides
DIY vs. Store-Bought Hose Guides
DIY hose guides are cost-effective and customizable, using recycled materials. Store-bought options offer durability but lack personalization. Choose based on budget, material quality, and desired flexibility.
Cost Comparison
DIY hose guides are significantly cheaper, using affordable materials like PVC pipes, rebar, or recycled items, costing 50-70% less than store-bought options. Store-bought guides may offer durability but lack customization and can be costly, especially for high-quality models. DIY projects allow you to save money and allocate resources to other gardening needs, making them a budget-friendly choice for gardeners seeking functional and personalized solutions without breaking the bank.
Customization Options
DIY hose guides offer endless customization, allowing you to tailor designs to suit your garden’s unique style. Use colorful paints, decorative bottle tops, or upcycled materials like vintage door knobs for a personalized touch. You can also vary heights, shapes, and placements to fit specific plants or spaces. This flexibility ensures your hose guides are both functional and visually appealing, reflecting your creativity and enhancing your garden’s aesthetic without compromising on practicality or durability.
Durability and Longevity
DIY hose guides are incredibly durable when made from weather-resistant materials like PVC pipes, rebar, or treated wood. These materials withstand harsh weather conditions, ensuring longevity. Proper installation and maintenance, such as securing the guides firmly in the ground and protecting them from rust, can extend their lifespan. With minimal upkeep, DIY hose guides remain functional and reliable for years, making them a practical and long-lasting solution for garden care.
Eco-Friendly Aspects of DIY
DIY hose guides are an eco-friendly choice, allowing you to repurpose materials like PVC pipes, rebar, or recycled household items. Using thrifted materials reduces waste and minimizes the environmental impact of manufacturing new products. This approach promotes sustainability by giving old items a new purpose, thereby conserving resources and lowering carbon emissions. Additionally, DIY projects encourage creativity and self-sufficiency, aligning with eco-conscious values and supporting a greener lifestyle.

Maintenance and Repair
Regularly clean your DIY hose guides to remove dirt and debris. Inspect for wear and tear, replacing damaged parts promptly. Use weather-resistant materials to prevent deterioration and ensure longevity.
Cleaning the Hose Guide
Cleaning your DIY hose guide is essential for maintaining its functionality and appearance. Use a mild detergent and a soft-bristled brush to gently scrub away dirt and debris. Rinse thoroughly with water to ensure no residue remains. For tougher stains or mineral buildup, soak the guide in a mixture of water and vinegar before scrubbing. Regular cleaning prevents clogging and ensures smooth water flow. After cleaning, allow the guide to dry completely to avoid rust or mold growth, especially if using metal components.
Replacing Damaged Parts
Regularly inspect your DIY hose guide for damage, such as rusted rebar or cracked PVC pipes. Replace damaged sections promptly to maintain functionality. For metal parts, consider upgrading to durable, weather-resistant materials like stainless steel or galvanized metal. PVC pipes can be swapped with new ones or reinforced with PVC cement. Use a pipe cutter or saw for clean cuts, and secure the new pieces tightly. This ensures your hose guide remains sturdy and effective. Keep spare materials on hand for quick fixes.
Winterizing Your Hose Guides
To protect your DIY hose guides during winter, remove and drain the hose, then clean the guide thoroughly. Store the guide indoors or in a dry sheltered area to prevent rust or damage from freezing temperatures. If leaving it outside, apply a protective coating to metal parts and cover with a waterproof material. Ensure all components are dry to avoid mold or corrosion. Regular maintenance ensures your hose guide remains durable and ready for the next gardening season.

Safety Considerations
Ensure stability by securing guides firmly in the ground to prevent tripping hazards. Avoid sharp edges on materials to prevent injuries. Use weather-resistant materials for durability and safety.
Ensuring Stability to Prevent Tripping
Stability is crucial to prevent tripping hazards. Anchor guides deeply into the ground using rebar or metal rods for firm support. Ensure the surface is level and compact the soil around the base to avoid wobbling. Avoid placing guides on loose or uneven terrain, as this can lead to instability. Regularly inspect and tighten any loose parts. By securing guides properly, you create a safer environment while maintaining functionality.
Use weather-resistant materials to withstand outdoor conditions. Avoid sharp edges or protruding parts that could cause accidents. Position guides in visible areas to alert family and guests. Test stability after installation by gently tugging the guide to ensure it holds firm. This attention to detail ensures your DIY hose guides are both practical and safe for everyone.
Avoiding Sharp Edges
Avoiding sharp edges is essential for safety and durability. When using materials like metal rods or PVC pipes, ensure all cut edges are filed smooth or sanded to prevent injuries or damage to the hose. Consider using protective sleeves or covers for sharp ends. For a safer and more professional finish, opt for materials with rounded edges or use heat to smooth out rough cuts. This step ensures your DIY hose guides are user-friendly and long-lasting.
Sharp edges can also damage hoses over time, leading to leaks or wear. By smoothing or covering these areas, you protect both the hose and anyone handling the guides. This attention to detail enhances both functionality and safety, making your DIY project more enjoyable and practical for everyday use.
Using Weather-Resistant Materials
Using weather-resistant materials ensures your DIY hose guides withstand outdoor conditions like rain, sun, and snow. PVC pipes and rebar are excellent choices as they are durable and resistant to rust and rot. Consider using galvanized metals or treated wood for added protection. Applying a waterproof sealant to wooden stakes can further enhance longevity. For a decorative touch, recycled materials like old door knobs or wine bottles can be used, but ensure they are sealed or treated to endure the elements. This ensures your hose guides remain functional and visually appealing year-round.
Troubleshooting Common Issues
Identify common problems like misaligned hoses, unstable guides, or leaks. Adjust the structure, ensure proper installation, and check for wear and tear to resolve issues effectively.
Hose Guide Not Holding the Hose Properly
If your hose guide isn’t holding the hose securely, check for improper fitting or loose connections. Ensure the guide is firmly anchored in the ground and adjust the structure for a snug fit. If using PVC or rebar, verify that the materials are sturdy enough to support the hose’s weight. Consider adding additional supports or tightening any screws or fittings to improve stability and prevent the hose from slipping out of place.
Guides Not Staying Upright
If your DIY hose guides are not staying upright, it may be due to inadequate anchoring or unstable materials. Ensure the stakes or supports are deeply embedded in the ground, especially in soft soil. Using heavier materials like metal rods or thicker PVC pipes can improve stability. Additionally, check for balanced weight distribution and consider adding a wider base or securing with concrete for extra durability. Regularly inspect and tighten any loose connections to maintain proper alignment and prevent tipping.
Hose Leaking Around the Guide
Hose leaking around the guide is often due to improper fit or worn-out connections. Ensure the hose is securely attached and the guide’s openings are the correct size. Inspect for any cracks or gaps in the PVC pipe or fittings. Applying waterproof sealant or adhesive can help tighten the connections. Regularly check for wear and tear, especially in high-pressure areas. Replacing damaged parts and ensuring proper alignment can prevent leaks and maintain efficient water flow.
DIY hose guides offer a practical, eco-friendly solution to protect plants and organize watering systems. With creativity and simple materials, you can create functional and stylish garden aids.
Final Thoughts on DIY Hose Guides
DIY hose guides are a practical and creative solution for gardeners, offering protection for plants and organization for watering systems. By using recycled materials like PVC pipes, rebar, or even decorative items such as wine bottles, you can create functional and stylish guides tailored to your garden’s needs. This eco-friendly approach not only saves money but also adds a personal touch to your outdoor space, making it both beautiful and efficient.
Encouragement to Try the Project
Creating DIY hose guides is a rewarding project that combines creativity with practicality. It’s an excellent way to spend a weekend, transforming simple materials into functional garden features. With minimal costs and effort, you can protect your plants while adding a personalized touch to your outdoor space. Whether you’re a seasoned DIYer or a beginner, this project offers a sense of accomplishment and the joy of seeing your handmade guides in action, enhancing your garden’s beauty and efficiency.
Additional Resources
Explore tutorials, videos, and DIY communities online for inspiration and detailed guides. Visit hardware stores or online platforms for materials and tools to get started creatively.
Recommended Tools and Materials
For making DIY hose guides, essential tools include a drill, saw, and hammer. Materials like PVC pipes, rebar, wooden stakes, or recycled items such as wine bottles or old door knobs work well. Weather-resistant paints or stickers can add color. Thrift stores are great for finding affordable materials. Hardware stores offer PVC fittings and metal rods. Online tutorials provide step-by-step guidance for assembling these guides effectively. Ensure all materials are durable and suitable for outdoor use to withstand various weather conditions year-round.
Useful Tutorials and Videos
Online platforms like YouTube and Pinterest offer numerous DIY tutorials and videos on creating hose guides. These resources provide step-by-step instructions, showcasing materials and techniques for various designs. Videos often demonstrate how to repurpose items like PVC pipes, rebar, and recycled materials into functional guides. Many tutorials also share creative ideas, such as adding decorative elements or upcycling old household items. These guides are perfect for both beginners and experienced DIY enthusiasts looking to enhance their gardening setup with practical solutions.
Online Communities for DIY Enthusiasts
Joining online communities like Reddit’s r/DIY or Facebook groups dedicated to gardening and DIY projects can connect you with passionate crafters. These platforms share ideas, tips, and inspiration for creating hose guides. Members often post photos of their homemade guides, offering creative solutions and encouraging others to share their projects. Engaging with these communities allows you to learn from others’ experiences, troubleshoot common issues, and gain new insights into making your own unique hose guides.